Showing posts with label diy. Show all posts

May 18, 2012

Style Log: Don't Worry, Be Happy

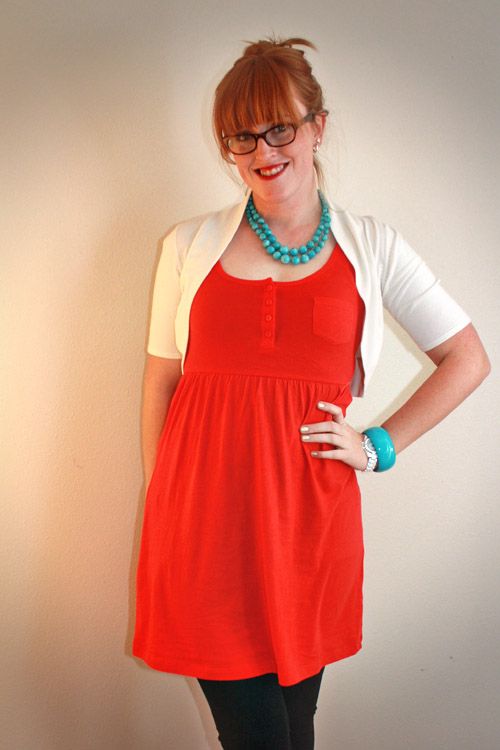
{dress/f21 :: watch/target :: everything else :: no clue :P }

I feel like I need to focus more on doing things that make me happy, rather than just things I just feel like I should be doing. I’m not talking about shirking my grown-up responsibilities or anything - just refocusing things. It’s getting warmer now and I plan on enjoying my summer fully.


So, some things I’d like to do...or stop doing:

-Spend less time in front of the TV. I mean that’s easier in the summer ‘cause “my shows” aren’t on, but still. Sometimes I just get to lazy and spend sunday afternoons watching movies. LAME.

-Be more active. Play lots of tennis. Take Theo on lots of walks. Maybe even play some basketball again. :P

-Explore. I will be living in a semi new town this summer, while I’m familiar with the immediate area I’m not with the surrounding stuff...there will be a lot of new places available to me within a hour or two drive. :)


-Get back into photography! This has really fallen back as of late, not cool, not cool. I really want to get back into the habit of taking my camera everywhere with me.

-I want to learn new things.  My commute is getting longer by about 40 minutes, so I'm thinking about getting some language CDs for the drive - spanish maybe?  Seems the most logical.  And maybe get back into the piano or guitar?

-Decorate or house!  Do DIY home and art projects!

-Maintain a healthy lifestyle.  Eat better!


Okay, that's all I can think of for now!
My friends are headed up this weekend for a girls weekend and I couldn't be more excited! It's gonna rock!  Hope you all have great weekends as well!

xo, kass
 

February 8, 2012

DIY: Braided Top Knot

Braided Top Knot


Is it just me or is the top knot crazy popular all the sudden? I had no idea there was even a name for this hair style until I read about it in the blog world. If your like me you’ve probably be sporting a “top knot” or what I like to call a messy bun since your pre teen years. While I do still love rocking the top knot {it’s a staple for my evenings and weekends} I like to spruce it up a bit for the work day. Enter the braided top knot! Just as easy and just as cute!

 1. Put a little bit of product in your hair. For example, some mousse or gel or pomade, but just a bit!. I find that it helps the braid from getting those lovely flyaways.

NOTE: If you want, tease your hair at this point {good idea if you have finer hair}. This will just make it look a little more messy and your hair won’t look like it’s pulled back as tight. I did not tease mine, as it’s thick and messy already. :P

2. Put your hair in a high pony tail. 

3. Put your ponytail into a braid. Don’t braid the hair too tightly, otherwise it will make it shorter and you won’t have as much to wrap. Secure the end with a hair band.


4. Twist the braid around the base of the pony tail and tuck the end of your braid under and into the center of the bun.  Sorry, I didn't get the best photos of this, but it's pretty easy.


5. Now secure this sucker with bobby pins. I only needed three, but use as many as you feel necessary. I would definitely secure the end of your braid and that little tail if it’s sticking up. Then I put in two more pins, one on each side...and VOILA! Incredibly easy right?! 
I like to add cute hair clips, like a flower, to the side of the bun. Just makes it a little more fun. :)

January 17, 2012

Pizzeria Date Night

Hola blog world! I feel like I sort of dropped off the blogosphere planet the last few days! I had yesterday off {government job perk!} and it felt like it was still the weekend, so I completely forgot to blog. I remembered about 9 pm, but then I decided it could wait!

Anyway, this weekend Brian and I started a new thing...date night! I wasn’t planning on it becoming a “thing”, but we decided we would do a special date night in once a month and take turns with the hosting responsibilities.  I thought I'd share in case anyone was looking for a cute and simple date idea, I know I always am!

We had talked about making our own pizza before, so I decided to do a Pizzeria Date Night! Here are some yummy pictures from the evening, I unfortunately didn’t get pictures of the pizza. We were just having too much fun and I forgot! He basically made a Supreme pizza on his half and I made a chicken and broccoli alfredo pizza, very good!

 Ambiance is everything!  I even made us a little sign! lol Don’t forget music too! I opened Pandora and played a station based on “That’s Amore” by Dean Martin, it was perfect pizzeria music!

This is the most amazing garlic bread ever! I just bought a tube of Pilbury’s Italian bread, cooked it for half of the time {about 15-20 min}, then I pulled it out of the oven to cool. While it’s cooling, brush on a homemade garlic oil/butter {just melted butter, a bit of oil, italian seasonings, and a lot of minced garlic}. Once it’s cooled, slice into the bread and stuff the slices with more of the garlic butter and lots of cheese, we used mozzarella and parmesan. Then bake it for the rest of the time. It was AMAZING!

Like I said, I don’t have a final picture, but here are all our fixin’s! We had alfredo and regular sauce as well as two different meats, cheeses and lots of veggies! We used pizza crust out of a tube and brushed it with the left over garlic butter, again so yummy!

I kind of forgot dessert until the last minute.  Brian's favorite is tiramisu, but I just didn't have the time.  So, instead I made this quick dessert based on tiramisu.  In a bowl, crumble up some Nilla wafers, pour a little bit of coffee over them, top that with vanilla yogurt and some whipped creme, then sprinkle some cocoa powder over it.  Top it off with a couple more Nilla wafers!  I think it was pretty yummy, not really tiramisu, but still good. :)

All in all, Pizzeria Date Night was a major success! Brian was already planning for his turn...he mentioned something about a Medieval theme? Sounds like fun! :)

January 10, 2012

DIY: 3 Tiered Jewelry Dish

DIY: 3 Tiered Jewelry Dish


I just made this bad boy last night and I'm super excited about it!  This is the first DIY I'm posting that I did completely on my own with out any help from another blogger's DIY, so I'm pretty excited about that too!  

This whole project was born from this photograph.  Thanks Pinterest!


Supplies:
3 plates
2 glasses
All Purpose Silicone Adhesive {clear drying!}
Tape measure
Pencil
1.  First pick out and wash your plates and glasses.  I bought a few options from our local second hand shop.  I found a couple with pink/purple-ish flowers so I just went with it!  A bit on the feminine side, but hey it's for jewelry on my vanity!

 2.  Before you do any gluing, set it up the way you think you want it.  Since I had a few different glasses, I played with them until I liked the result.
{I would also like to make a note here, I was originally planning on spray painting the glasses a metallic, but decided against it.  If you want to spray paint just the glasses or just the plates, do it now!  If you decide you want to spray paint the entire thing one color, then you can do that at the end.}


 3.  I took the tape measure to figure out where the center of my plates were, then I put the base of the glass on and traced them with a pencil {don't worry it'll wipe off later if it shows}.  I also took the tape measure and measured around the base of the glass to the edge of the plate all around it, just to be sure it was in the center.


4.  Lay your bottom plate on a flat surface.  Take the first glass and line the base of it with the adhesive then press it down onto the plate.  Hold for a minute or two.  Then, I think I let mine set for 5 minutes or so.  Next, adhere the second glass to the second plate.  So, you'll have two plates with glasses on them.

5.  Now, put adhesive on the lip of the first glass and press the second plate {and glass that's glued to it!} down.  Hold for a minute or two.  Then, line the lip of the top glass with adhesive and press the final plate on it.  NOTE:  It doesn't take a lot of pressure.  Don't push to hard, because your lower plates and glasses may slide around a little.


The adhesive takes 24 hours to dry, so set it aside and don't touch it.  Since, the adhesive is a silicone sealant it sort of moves around a bit until it's dry!  Since I just did mine last night I don't have jewelry in it yet, but I love the way it turned out!

If you decided to try this DIY, please let me know!!


December 28, 2011

Recipe: Irish Cream Liqueur

Here’s another holiday recipe for you ...Irish Cream Liqueur! This is a great and simple gift! I found a recipe on Allrecipes.com and altered it a bit. It’s a gift for my Dad and I haven’t taste tested it yet, but I’ll report back!

What You Need:
1 cup of milk
1 (14 ounce) can sweetened condensed milk
1 cup Irish whiskey {I cut back from 1 ⅔ cups}
1 teaspoon instant coffee granules
2 tablespoons chocolate syrup
1 teaspoon vanilla extract
1 teaspoon almond extract

What You Do:
1. In a blender combine all ingredients.  I combined them in a bowl, then mixed them up in my Magic Bullet, because I don't have a blender!
 
2. Store in a tightly sealed container in the refrigerator. Shake before serving.

That’s it! Easy right? Not much of a recipe, but I still wanted to share. Also, since mine is a gift I made a cute little label for it. I also used a similar label for my Cinnamon Vodka!


Hope you all had a Merry Holiday!

December 27, 2011

DIY Gift Review!!

Now that all my family’s gift giving has past, I thought I’d give you a quick photo tour of the gifts I made!

I made Cinnamon Infused Vodka for my Mom and best friend. Then, I made some Irish Creme Liquor for my Dad! There will be a recipe for that on Wednesday!

 This was another gift for my bestie! I followed the tutorial here!

I made these “stay put dish towels” for both of my grandma’s! I used the tutorial on Pin. Sew. Press!


I made a couple of these totes I found for my Mom and bestie! I ended up lining my moms with material from an old pair of corduroys!

I had this really awesome picture of my grandpa, so then I used a thrift store frame to make this awesome one!


I made these puppy treats for all of my canine family and friends! I got the recipe from ”Come On Ilene!


Last, but not least I made these word photography prints for my mom and grandma’s! I went out and took all the photos and assembled them.

I just want to say thanks to all those other bloggers out there for posting such awesome tutorials! You helped make my holiday’s a hit! :)

December 22, 2011

DIY: Wood Slice Picture Frame

I saw this frame on Modcloth.com and thought, wow I could totally make that! So this is my version, it’s a pretty easy and quick DIY and it turns out really awesome! Now I should give a little disclaimer, I say it’s quick and easy, but my father cut all of the wood for me and then actually mailed it to me [as we live quite far apart]. How nice was that? Thanks Dad!!


Photo is mine, of my grandfather.


What You Need:
Sticks to cut up, or already sliced sticks/wood
Hot glue gun and glue
Picture frame


What You Do:

1. First you need to slice up your wood. Decide on a thickness and try to stick close to that. I believe I had my father cut mine between ¼ and ½ of an inch.


2. Lay out the slices on your frame. Mine kept slipping off, but it definitely helped. It gave me a starting point. I had to adjust and improvise near the end, but I definitely recommend laying them out a bit to help get you started.


3. Start gluing them on! I used hot glue, but I’m sure there are better glue you could use. Hot glue has a bad rep of popping off [I think], but it’s what I had available and honestly it worked fine.

See! Super easy! I have some left over wood slices, so I’m trying to think up some ways to use them. I’m thinking maybe some coasters for my Dad’s bar? Should be pretty easy, some felt, some cardboard and more glue! :)

December 9, 2011

Friday Favorites: Map Love!!

I don’t know if I ever have mentioned what my day job is - I’m a GIS Coordinator. Go ahead google it, you know you want to. I’ll wait.

Alright, the gist of it is map work. Or at least that’s the gist of it for this post! In any case, I’m a total map nerd! So, here is some map love courtesy of pinterest and all those other map nerds. :)


*Such a good idea for an art piece and/or gift!*


*Hmmm, I wonder where I could find room for this. Actually, I wonder where I could even get a huge wall map? OH! Maybe I should ask my geography teacher boyfriend? :P*


*I shall start collecting globes*


*Fantastic!*


*Cute!*


*I need to make this asap!*


*This is a must have for any map nerd’s Christmas tree!*


*This could be a really great gift for someone!*


*umm, Yes pelase!*


*Ooo, I like! Very pretty!*


*Just a few more ideas....*

Happy Friday!
Related Posts Plugin for WordPress, Blogger...