
Today I thought I would share another home project with you. I have this huge stark white wall in my living room that is just asking for some love and attention. Originally, I had planned on asking my landlord if I could paint it, but then I thought it seemed silly to spend extra time and money on something that I can’t take with me when I move. So, then I decided I would figure out some sort of art piece [or a couple] to take up the space.
After much research, I decided I would just do an interesting photo wall. Pinterest really helped me out on this. :)


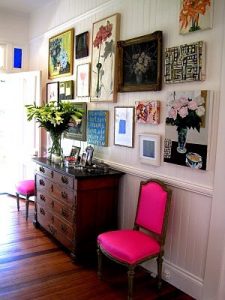

In a magazine or somewhere, I can’t remember, I had seen a picture of a wall with lime green empty frames and I was instantly in love. I decided that I liked the more ecclectic/mis-matchy feel, rather then the photos be all lined up and the same. So, I started collecting random frames from our local thrift shop. Super cheap and a great way to get a good mix. Here’s a little walk through and some pictures of what I have done so far.
After I gathered enough frames, I started playing with the layout. First I was doing this on my livingroom floor, but I just couldn’t get it right. You’re probably going to laugh at this next thing, but oh well. I decided to measure all the frames the create a layout in photoshop. :)

It worked really well! After that I laid them out on the floor according to the PS image, to get a better idea of how they worked together. I was happy with it, so then on my PS sheet I assigned a color to each frame, then moved on to spray painting!

First, just let me say I’ve never spray painted anything before, so I was just sort of flying by the seat of my pants. I read a couple online articles about painting frames, then I just got on with it! For the wooden frames I lightly sanded them with 220 grit - lightly! Then I primed them. I also primed all the other dark frames.

After the primer set, I sprayed the frames according to my little cheat sheet. I ended up changing a couple and added a third color, but basically stayed with my originally idea. I had a couple hiccups with little gnats, some drips and some major finger cramps, but all in all it worked pretty well!

Next is hanging them! AHH! Obviously, I wanted to be sure they got up there straight and that the spacing was correct. After thinking on it for awhile I decided to use the ol’ newspaper trick. Basically, you lay out some news paper [or tissue paper, wrapping paper, whatever], lay your frames on top of it then trace them. I even went so far as to figure out about where my nail holes should go. You then tape this masterpiece up on the wall and hammer in all your nails. I hung up the frames once too, just to get a feel for it all.

Now just rip the paper off and ...VOILA! For hanging frames I keep some wall putty on hand in case there are some unruly ones that refuse to sit straight. A little pinch in the corner will work magic!

Isn’t it beauTIful?
The artwork are just different prints I had or printed. I actually created the one with the Incubus lyrics in photoshop with an image I found through google. Fun stuff! :)
If you have an questions on this project or if you have ideas/tips from your own experiences please share them!!
peace, kassie
No comments:
Post a Comment